Lab 04 - Dataflows
Microsoft Fabric includes multiple methods of loading data into tables. In this section we will load the contacts file using a Dataflow Gen2. Dataflows are not new to Power BI, but have been updated to include writing the results to a destination.
Create a Dataflow
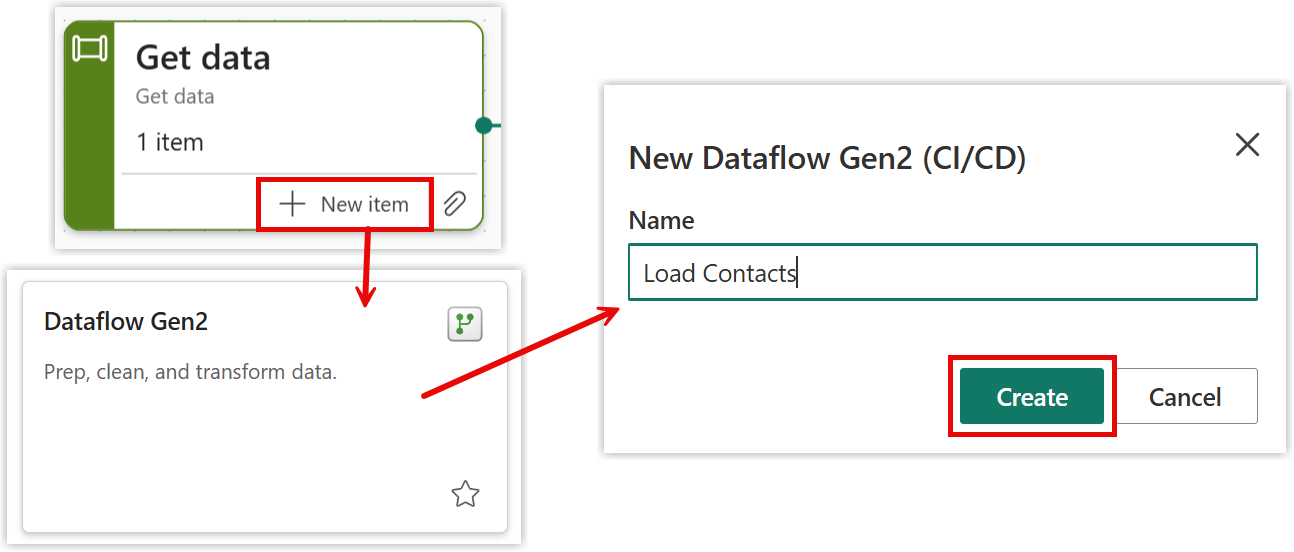
A dataflow is a Get Data action, so click New item in the Get data task. In the list of options that appear on the right, select Dataflow Gen2.
Instructions
- Click on New Item on the Get Data task
- From the panel on the right, select Dataflow Gen2
- In the New Dataflow dialog enter in the name
- Click Create
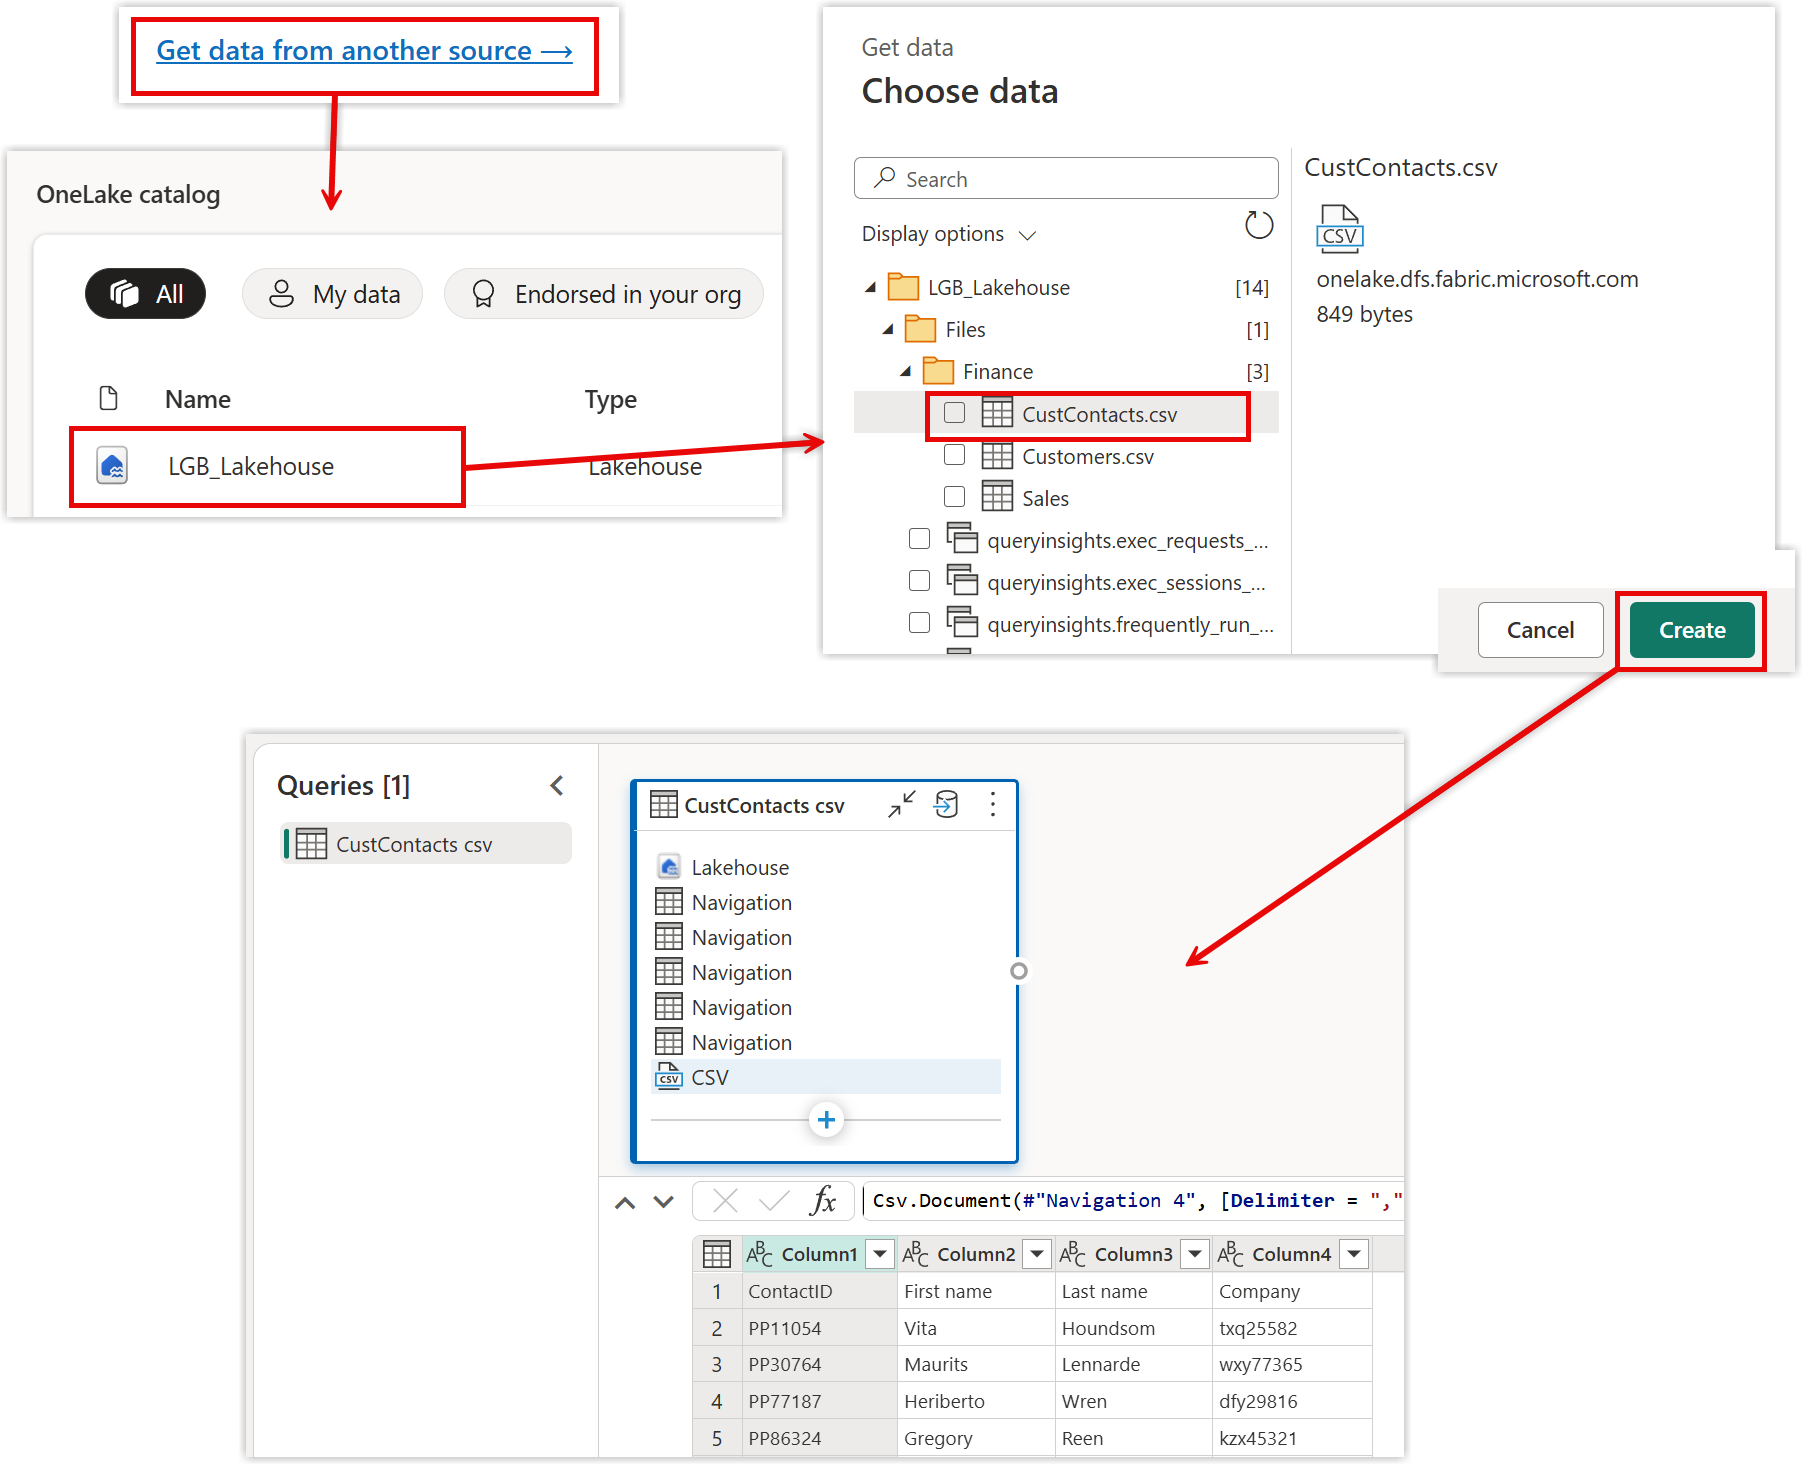
The empty data flow will show you a set of possibilities, none of the options match what we need so we need to click Get Data from another source. This will show us the a dialog with the complete range of connections that could be made. We need to connect to a file in a Lakehouse so therefore in OneLake.
Instructions
- Click on Get data from another source
- Under OneLake catalog find your lakehouse
- In the Choose data dialog, expand Files, then Finance
- Select CustContacts.csv
- Click Create
Adding Transformations
Dataflows use Power Query to transform data into the structure we need. Our file needs very little transformation with just promoting the first line to be column names and tweaking the names slightly. This is an online version of Power Query you find in Power BI desktop and Excel.
Promote Headers
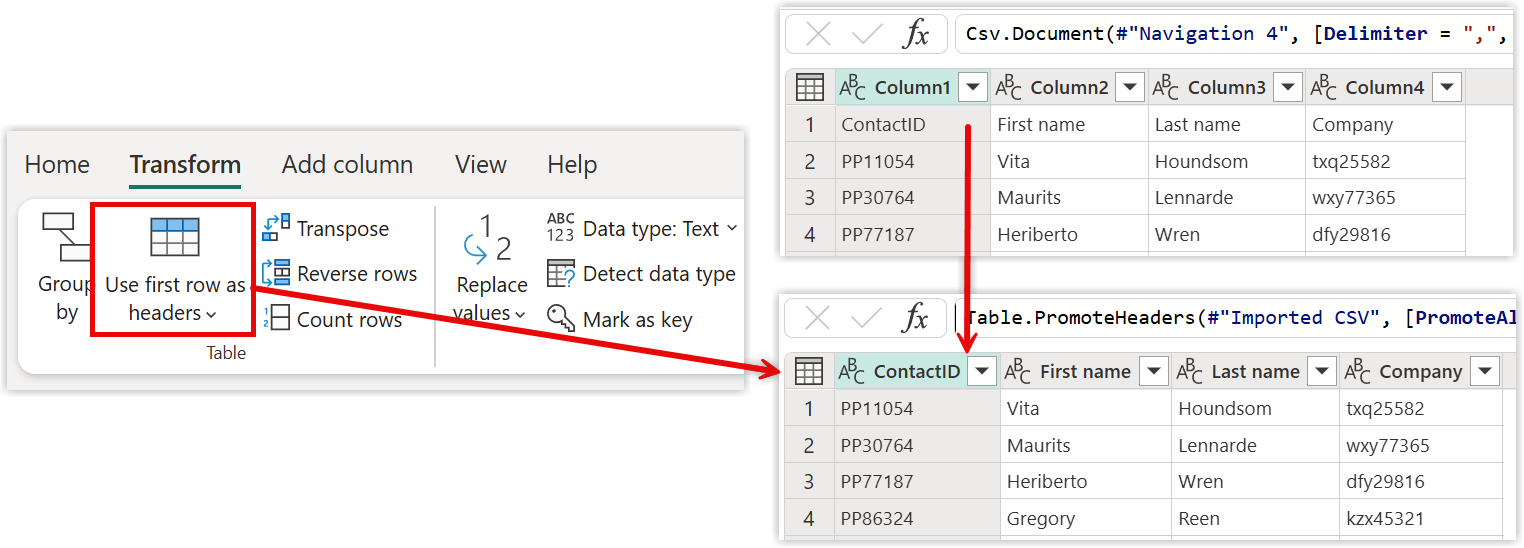
The first row of the data is the column names. This can be fixed in one step using the Use first row as headers button on the Transform ribbon
Correct Column Names
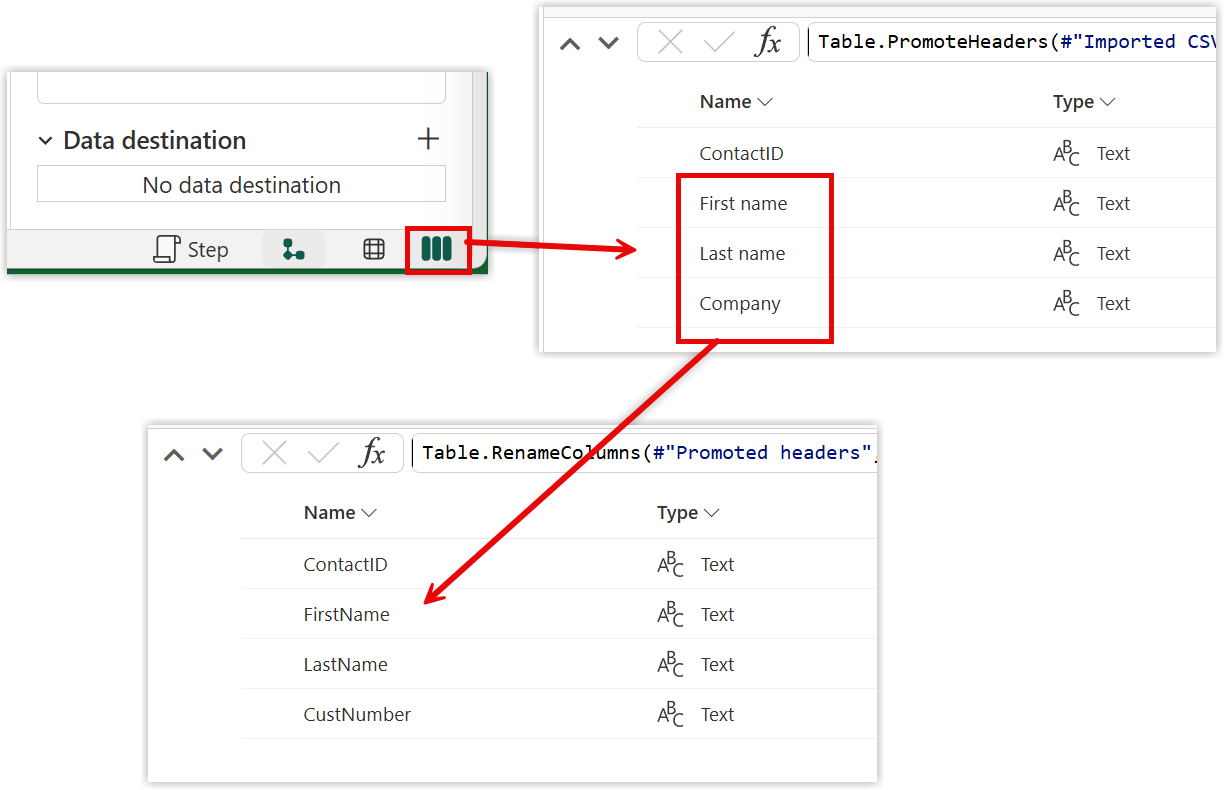
The next step is to correct the column names. Spaces often get removed names and the Company column is called CustNumber in the Customers table. Although this view is very similar to Power Query in Power BI and Excel it has a few extra features. So for this next part we will introduce the schema view.
Instructions
- In the bottom right hand corner, click on Show Schema View
- In the list of column names, double click on the ones to rename.
- Once you are satisfied with the names, click on Show data view to return to the data
Note
Schema view is great for checking column types and allows you to make changes without waiting for a data refresh.
Transformation Steps
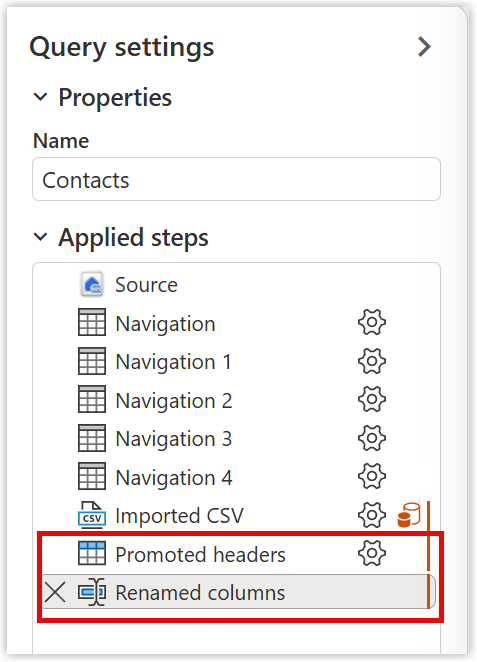
Every step in the transformation is listed in the Query settings pane on the right, you might need to expand it. You can see the two 2 steps we added at the bottom of the list. Clicking the X on a step will delete it. Be aware there is no undo. You can also type in a good name for the query.
Setting a Destination
Dataflows Gen2 include adding a destination. So the final step in the dataflow creation is to add that destination to the query.
Instructions
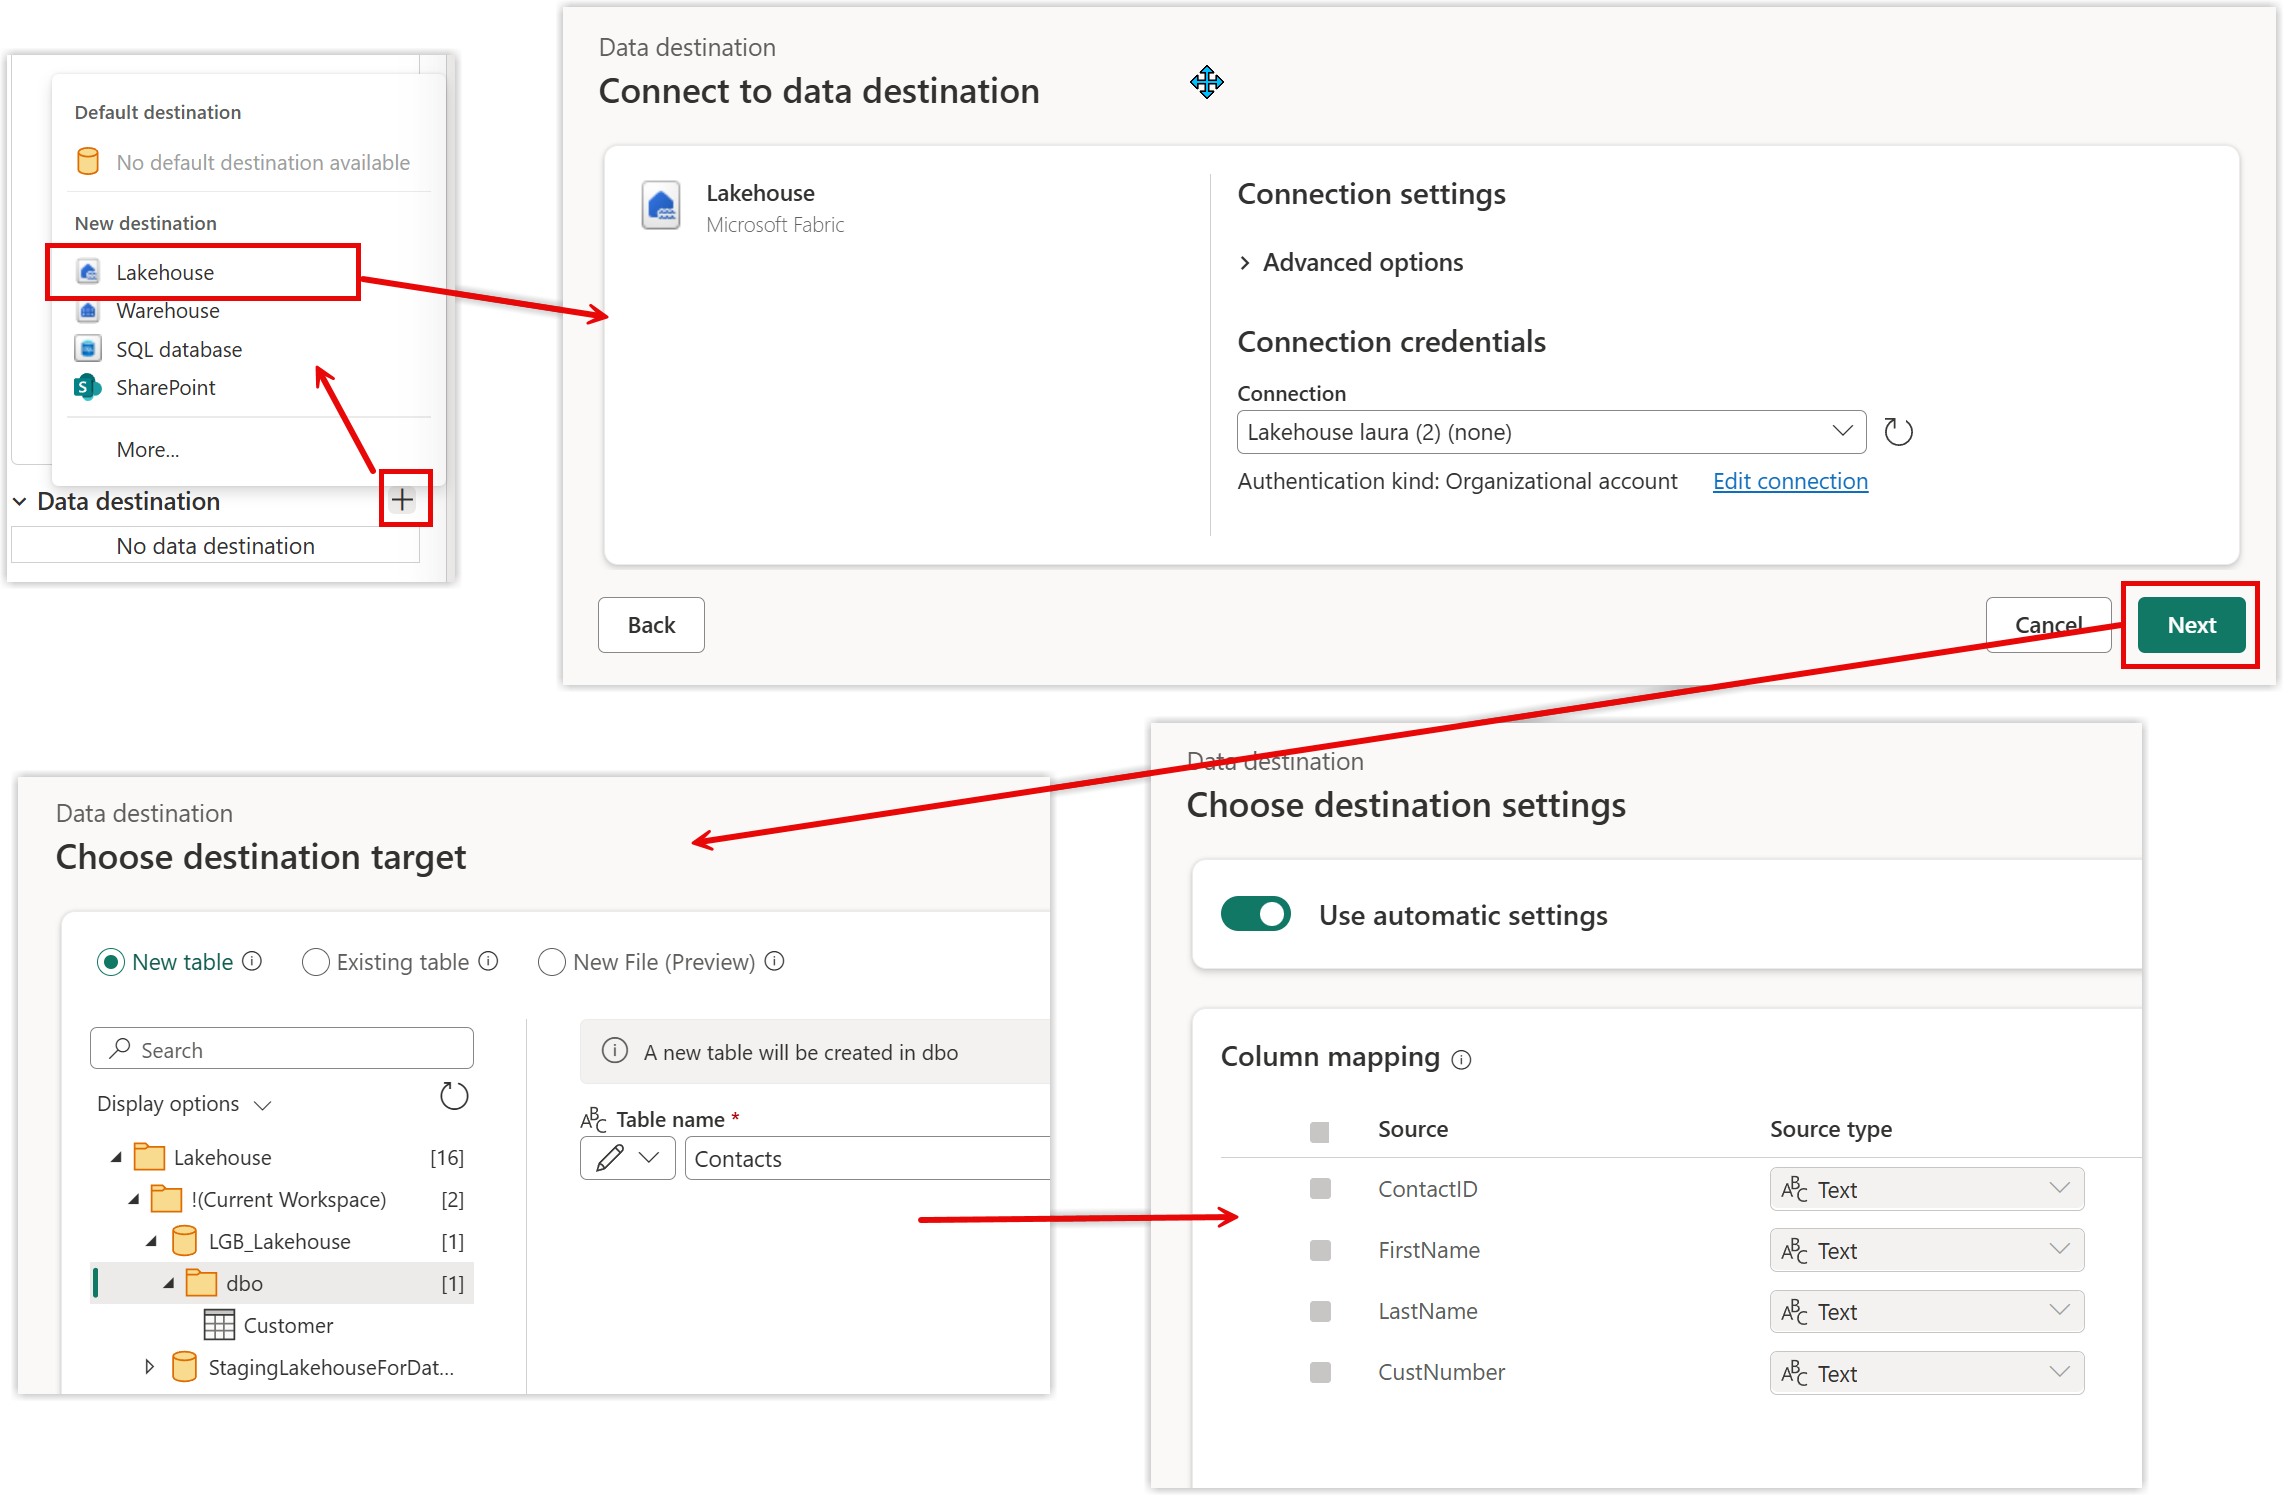
- In the bottom right hand corner of the dataflow click on the + next to Data destination
- Select Lakehouse from the list
- The next dialog should show you a Lakehouse connector already created, click Next
- On the next dialog, expand Current Workspace, you lakehouse and dbo
- Confirm the new table name and click Next
- The column mappings should be fine so you can click Save Settings
Destination Indicators
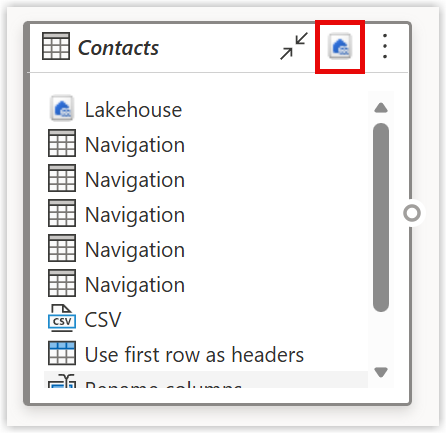
When a query has a destination an icon appears on its tile in the diagram view and the bottom right will now say Lakehouse.
Note
When a dataflow has multiple queries each query can have a destination. If queries are linked this will show in the diagram view.
Running the Dataflow
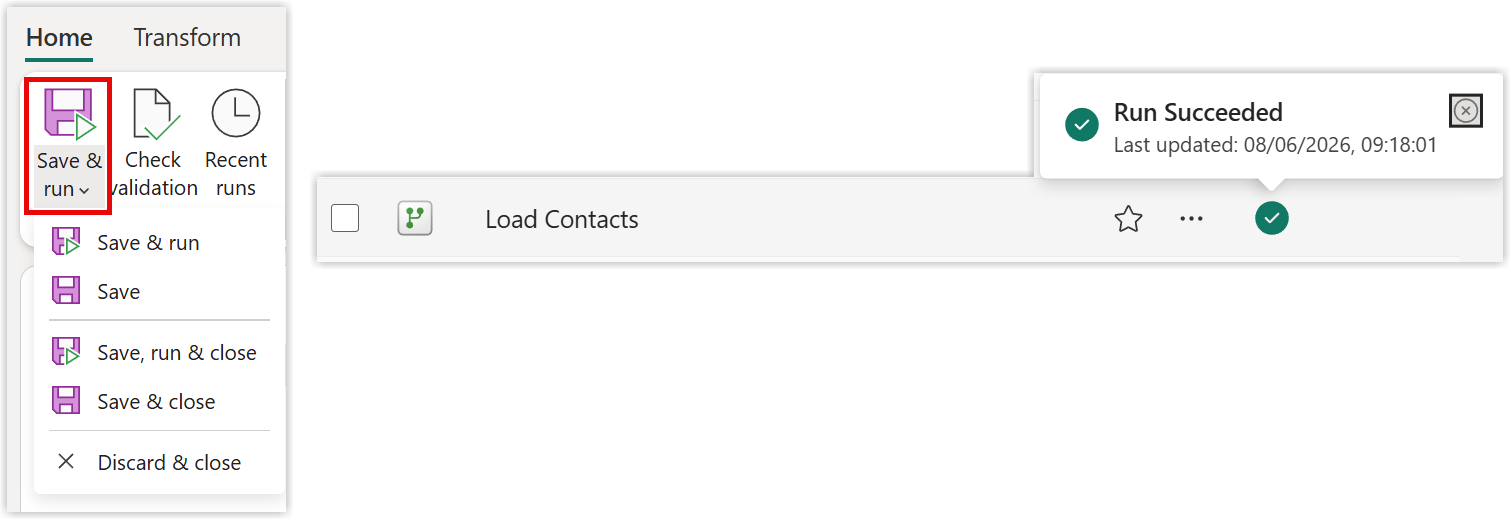
Once the queries have been created we need to run the dataflow. On the home ribbon is a Save & Run button that gives a number of options. Select one that includes run.
If you return to the workspace, once the dataflow has run successfully it gets a green tick. (I have no idea why, might be something to do with CI/CD bit). If you hover your mouse over the tick it shows a message saying it ran successfully.
Lab Complete
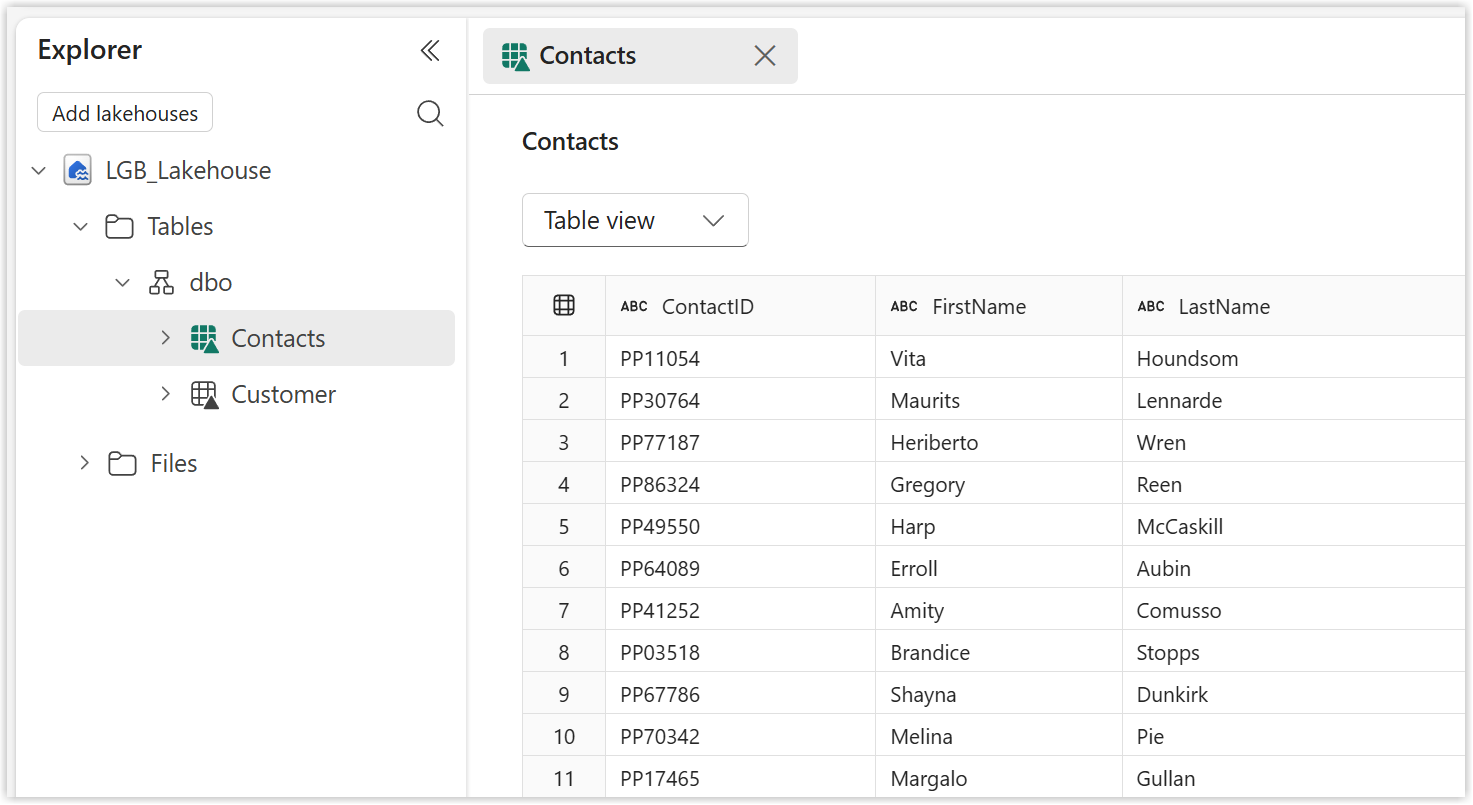
At the end of this lab you will have a dataflow and in the lakehouse will be a table of contacts.