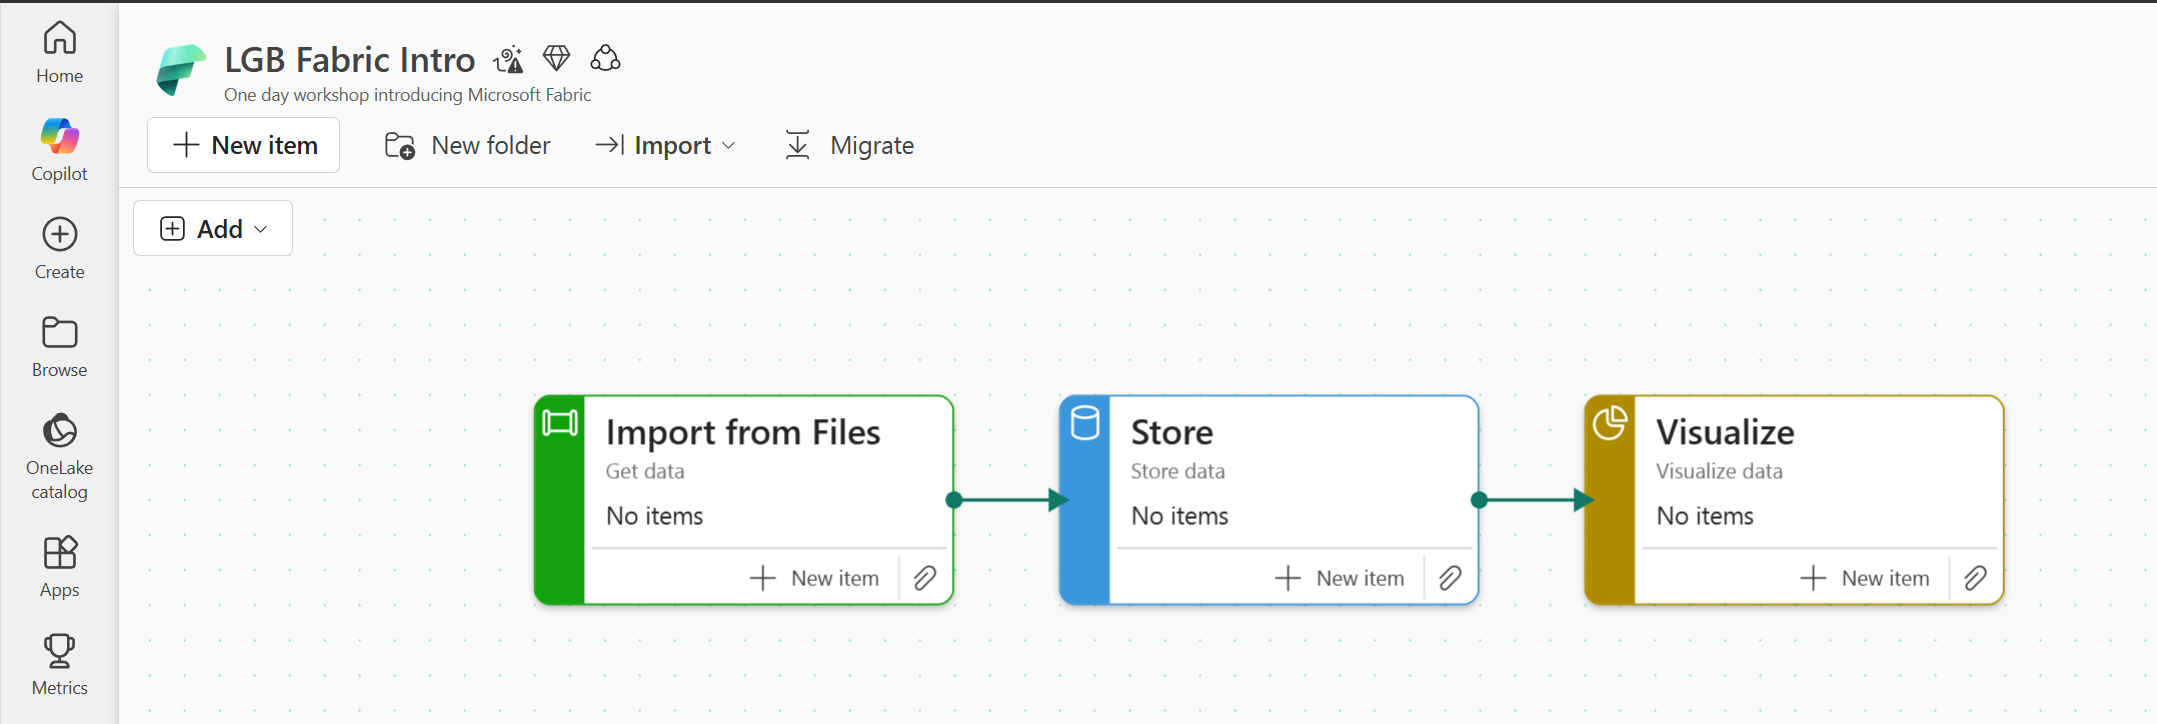
Lab 01 - Workspace and Task flows
In this lab we will create a workspace and explore how a task flow can help visualise and document your Fabric solution.
Create a Workspace
Workspaces are the container for all the Microsoft Fabric artifacts. You can control who has access and what access each person has.
For this workshop, to make life simpler we are going to use a new empty workspace. So the first task is to create a workspace.
Instructions
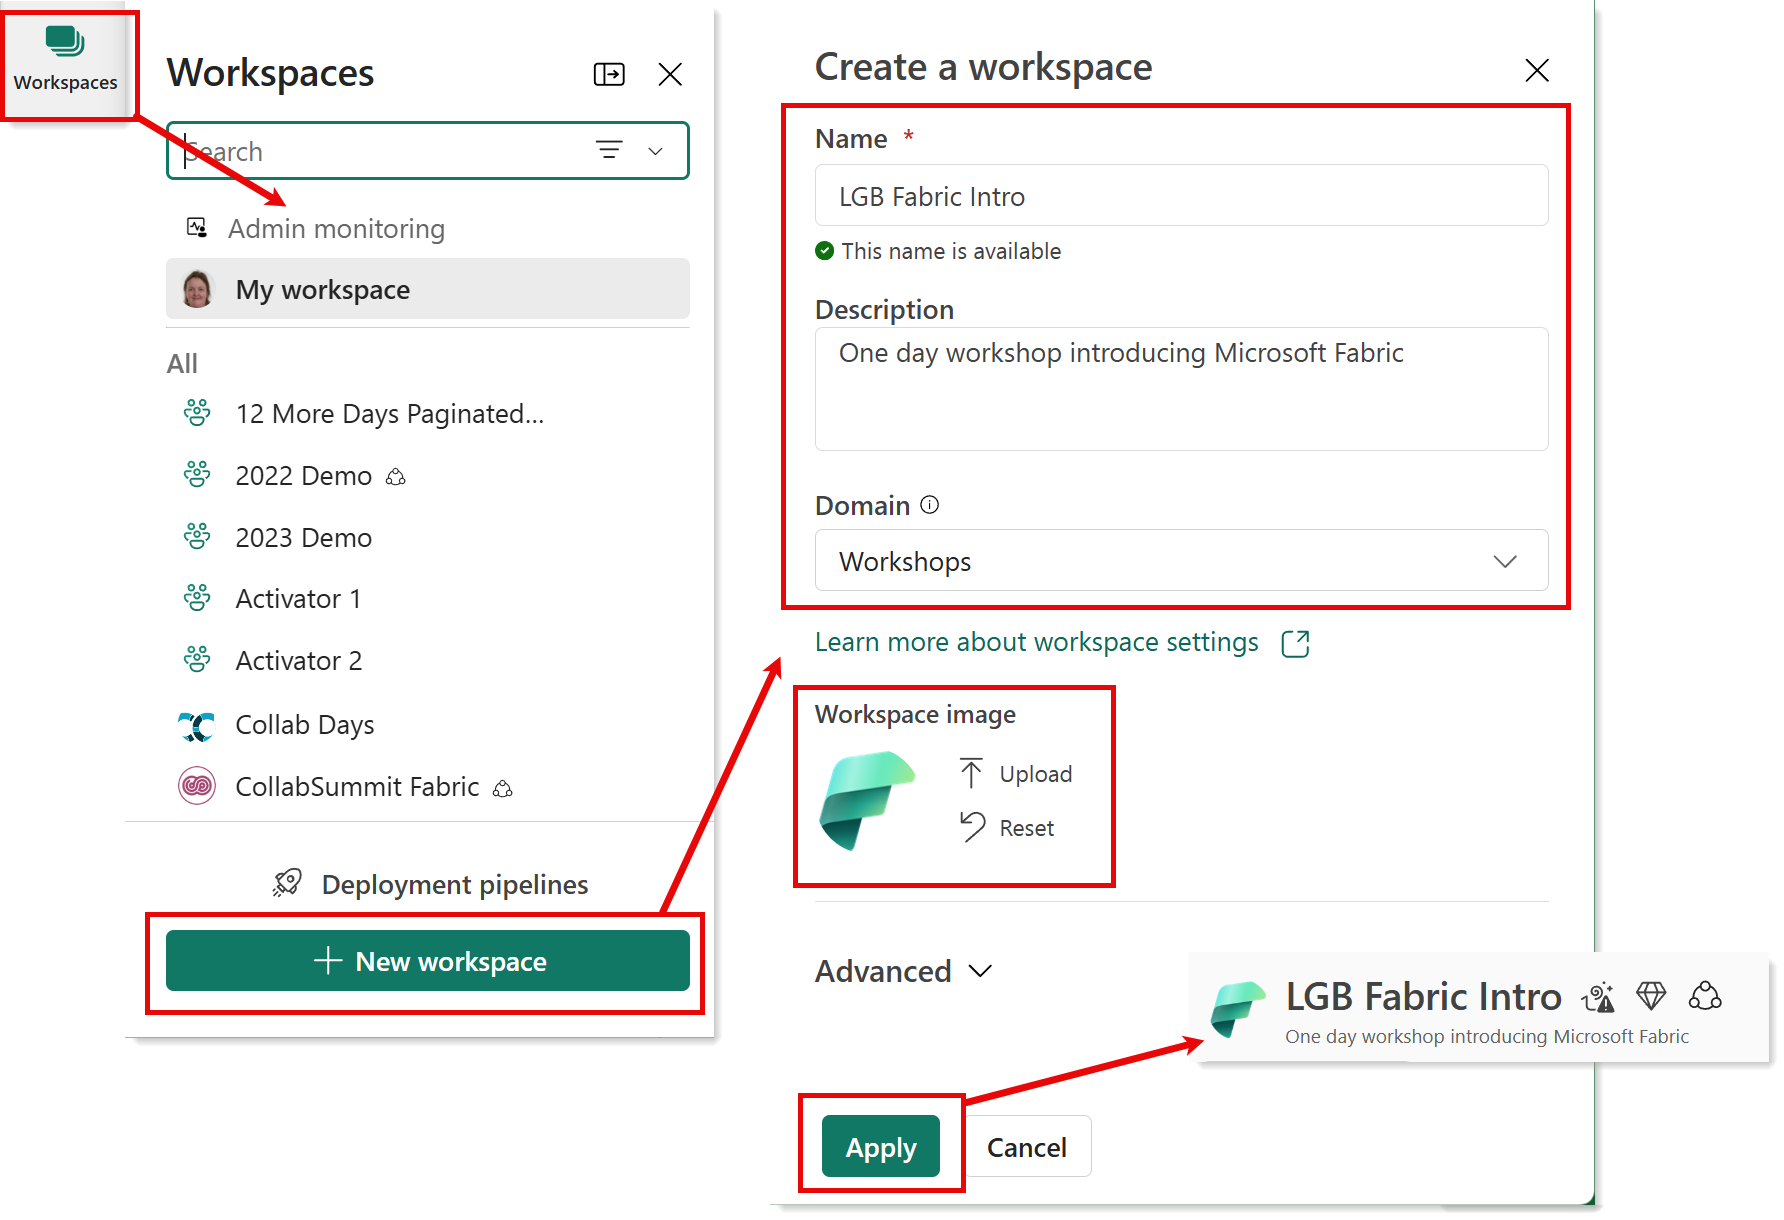
- Click on Workspaces in the left hand list of icons to list all your workspaces.
- Then click on + New Workspace at the bottom.
- When the form appears on the right, enter in a unique name for your workspace. It is good practice to include a description and where possible select a domain.
- Adding a Workspace image will help you and others navigate the workspaces. This workshop resources include some suitable images. 1.Finally click Apply and you should navigate to an empty workspace. Make sure the workspace has a premium diamond next to the name.
TIP
Your company might restrict creating workspaces. The workshop will create multiple artifacts so if you decide to use an existing workspace please let other workspace users know. You can use My Workspace if need be
Microsoft Learn Link - Workspaces
Taskflows
Workspaces now include the ability to draw a diagram illustrating the dataflow across the artifacts in a workspace. These are called Taskflows. The different boxes are referred to as Tasks.
Adding Tasks
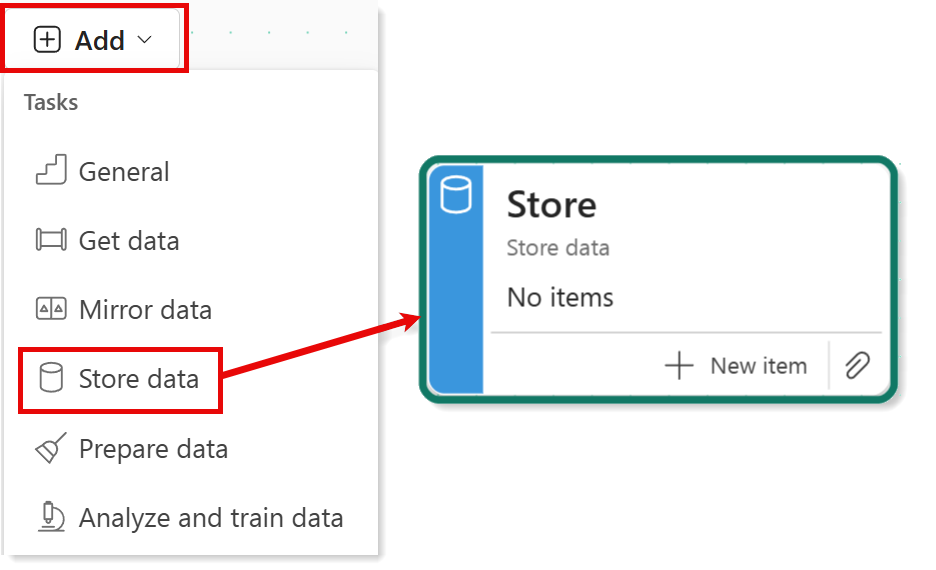
There are different types of tasks to add to the taskflow. Each one has default list of artifacts, for example the Store task would be the place to find lakehouses or warehouses. For the first task the drop down "add a task" is in the centre of the window, for future adds the drop down is renamed to add and moves top left of the Task flow window.
Instructions
- From the add drop down select Store data and a blue task box, called Store, will appear.
- Add another task of type Get data.
- Then add another task called Visualize.
- Arrange the 3 tasks in a row Get data, Store and Visualize.

Linking Tasks
Task flows are there to show the relationship between different Fabric artifacts, for example a dataflow gets data to store in a lakehouse, so the Get data task would connect to the Store task.
Instructions
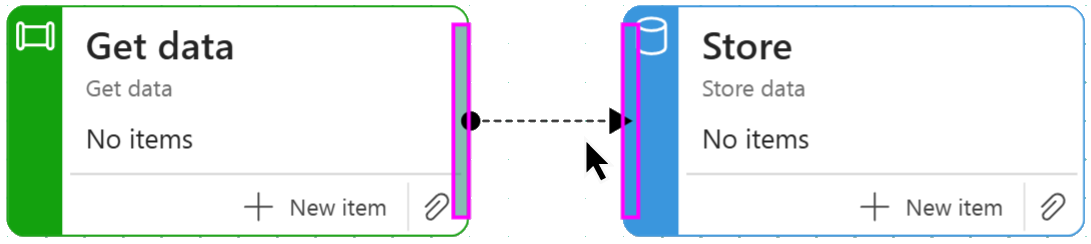
From the edge of Get data click and drag towards the Store task
When a link appears release and the link appears,
Create a link between Store and Visualize tasks
Renaming Tasks
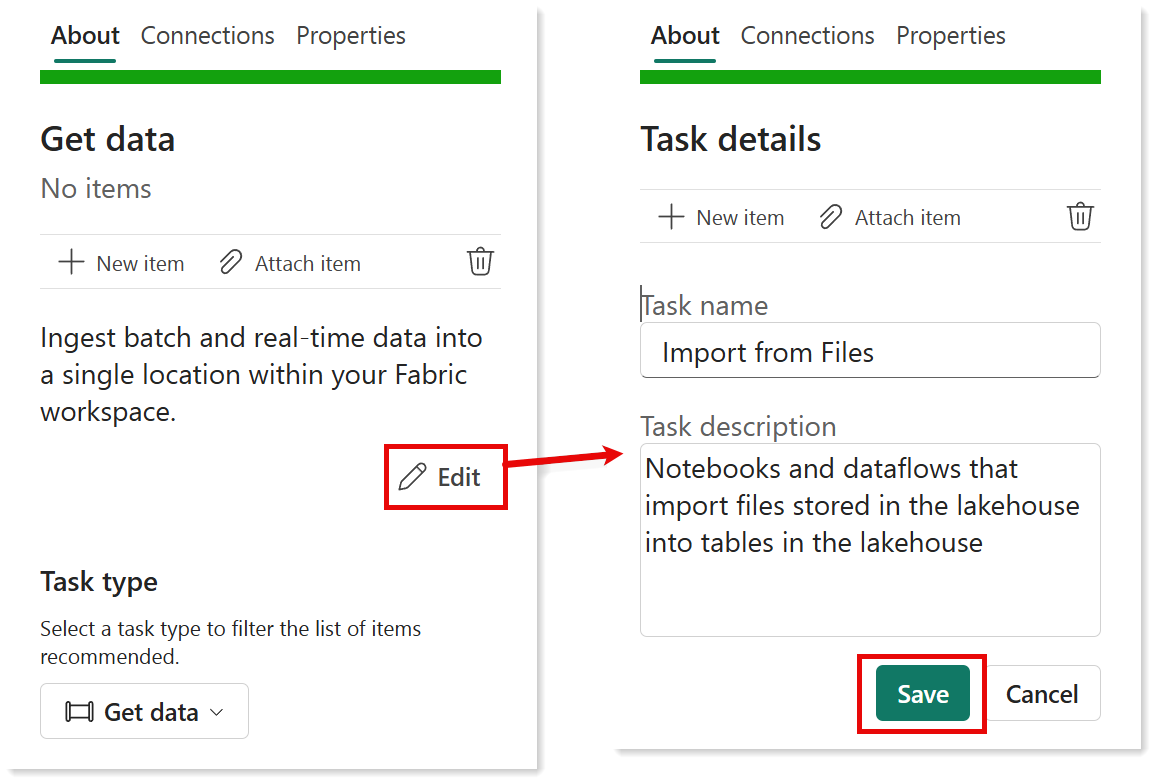
Tasks have generic names when created. This works for simple flows but when you have multiple tasks of the same type it helps to rename them and adds to the documentation for the solution
Instructions
- Click on the task you want to rename.
- In the panel on the right, click Edit.
- Change the Task name and description and then click Save
Lab Complete
At the end of this lab you should have a workspace with a taskflow of three tasks.