Power Automate – Get data from a Power BI dataset
Power BI datasets contain a rich useful data resource that would be really useful in a Power Automate flow. In this post we will walk through how to get data from a Power BI dataset and then email that data. This is just one example of how you could use data fetched from a Power BI dataset behind a report.
YouTube Version
Starting the Flow
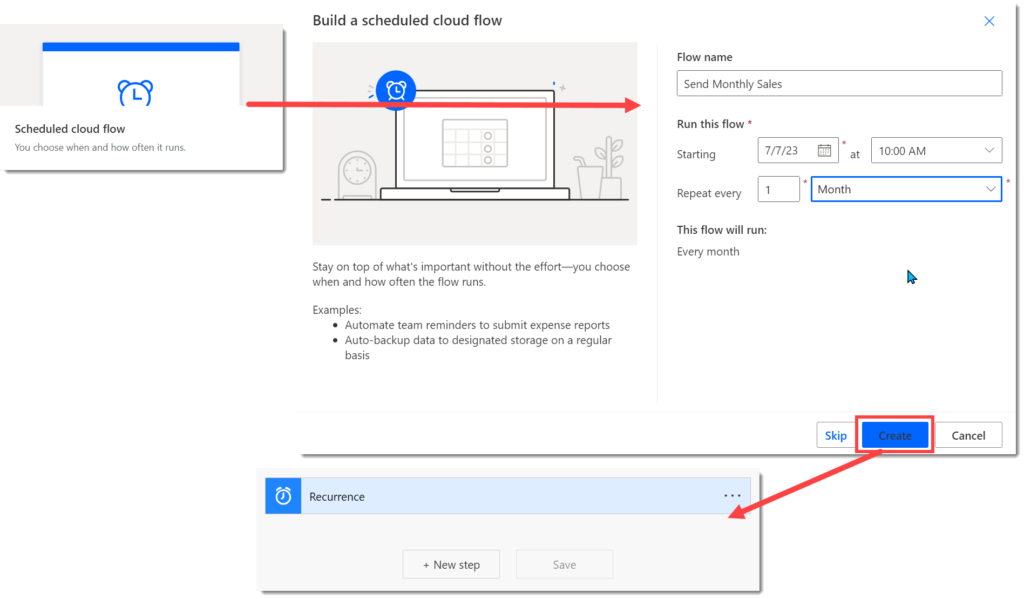
In this example we want to send a monthly quick summary. So I started by creating a scheduled email, repeated every month. After I enter the flow name and change the repeat to every month rather than the default every minute! Now I can press Create, which after a few moments creates a flow with the recurrence step.
Fetch Data using a Power BI step
Click on New step to start the process. In the search box type in Power BI and click on the Power BI tile when it appears. Now you can search the Power BI actions. In the search box enter in query and this will filter to 2 actions. The action we want is Run a query against a dataset.1

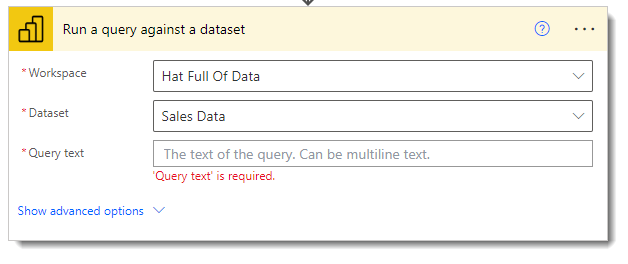
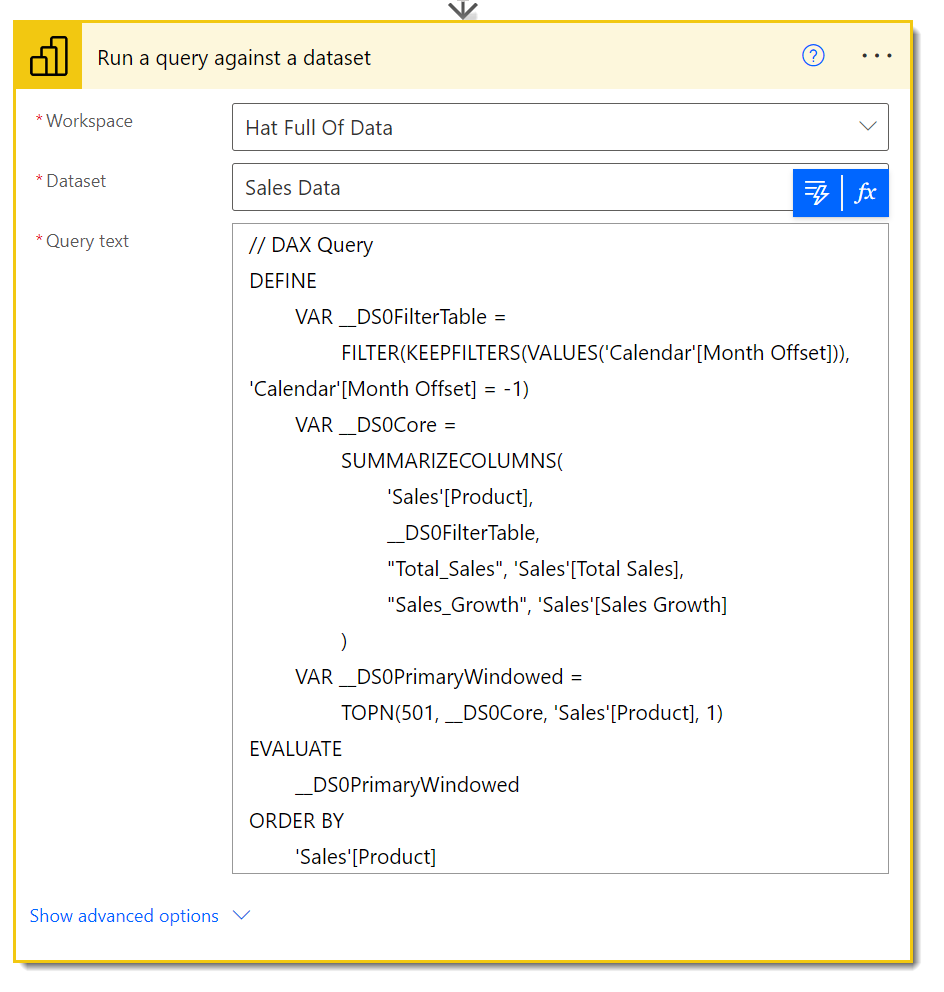
When the step appears, I select the Workspace and Dataset I am interested in. The query text is expecting a DAX statement. Don’t worry you don’t have to write the DAX by hand, we can get Power BI desktop to do it for us.
Writing the Query Text
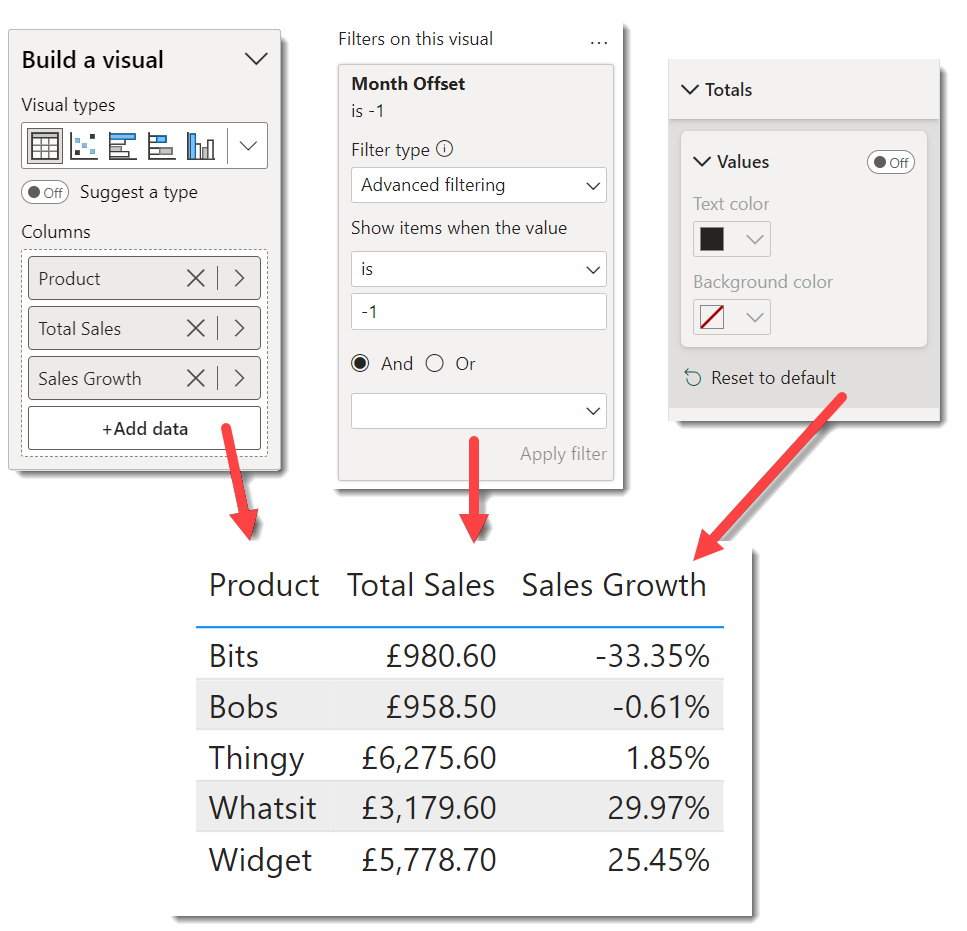
Power BI desktop can write the query text for you. You need to open the Power BI report or a report connected to the dataset. On a blank page add a table visual. Populate the table with the data you want to use in Power Automate remember to apply the correct filters. I also recommend you remove totals unless you want the totals row in your data.
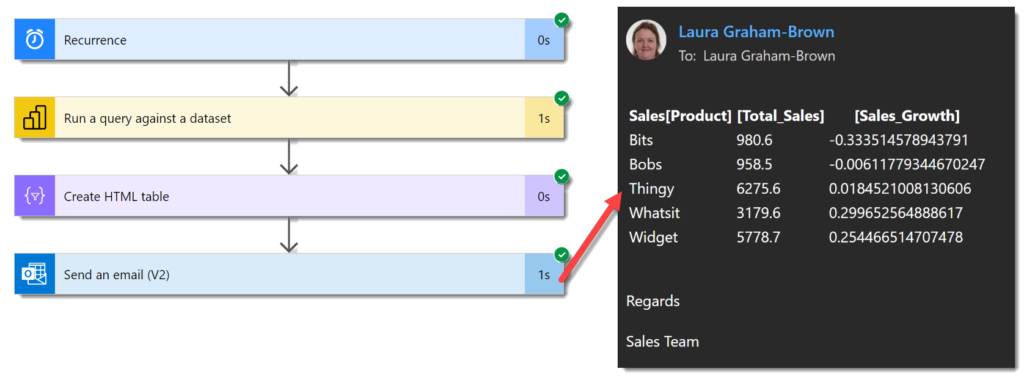
In my example the table shows Total Sales and Sales Growth for products in the previous month, using Offset Month column from my calendar.
After creating the table, on the Optimize ribbon tab click on Performance analyzer2. When the pane appears on the right hand side, click on Start Recording. Then you click on Refresh Visuals. This tool is usually used for analysing how long each visual takes to refresh and part of that is to provide the query being run.
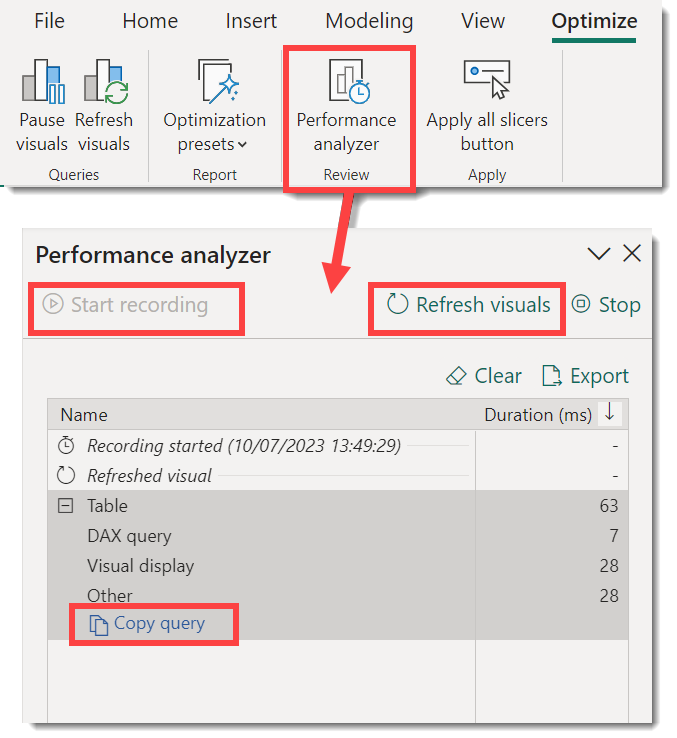
Expand the Table line by clicking on the +. Then click on Copy Query. Now you can return to the flow in Power Automate and paste the query into the query box.
Sending the Email
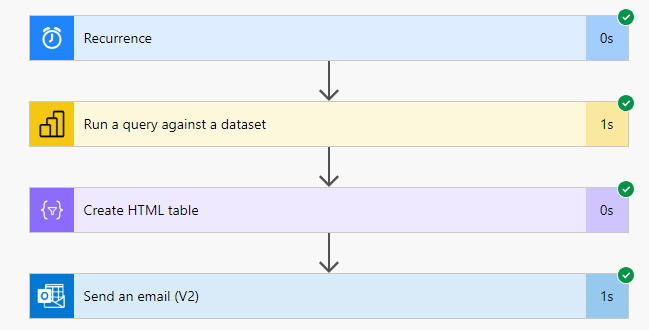
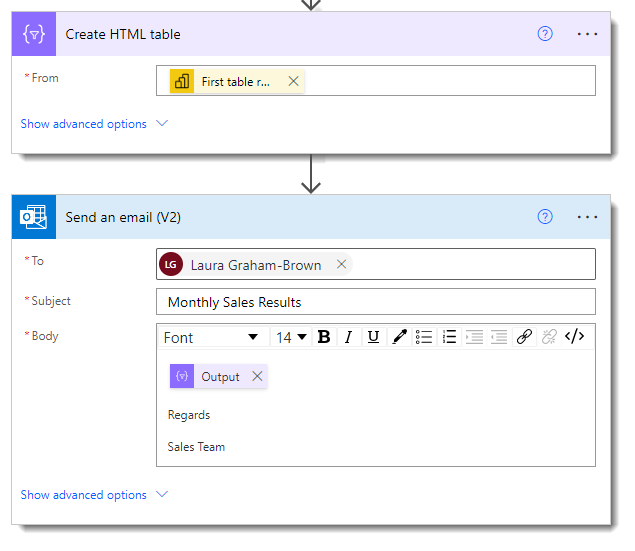
The final part of this process is to create the email to send the details. The Power BI step returns an array of the rows of data. The Send an Email action would like this array converted into a html table. So we need 2 actions, create HTML table and Send an email. I am not going to make the table or email pretty. That is a separate post!
Testing the flow
I would test as I added each action to the flow, even on a short flow. Obviously once completed I’d test again.
Resources
The report used for this example can be found on my GitHub
- Power BI Report – https://github.com/Laura-GB/DemoData/raw/main/Sales%20Data.pbix
- Excel file https://github.com/Laura-GB/DemoData/raw/main/Sales%20Data.xlsx
Conclusion
Remember its Power Automate not Power Integrate. So yes you can load a long list into Power Automate but this is not a good tool to load large quantities of data into a new system. This is a brilliant feature though that unlocks data in a dataset for an automation process.
More Power Automate Posts
- Creating Adaptive Cards
- Refreshing Datasets Automatically with Power BI Dataflows
- Power Automate Child Flow
- Get data from a Power BI dataset
- Power Automate Button in a Power BI Report
- Write Me a Flow
- Power Automate and DevOps series
- Power Automate and Power BI Rest API series
- Save a File to OneLake Lakehouse
- Trigger Microsoft Fabric Data Pipeline using Power Automate
More Power BI Posts
- Conditional Formatting Update
- Data Refresh Date
- Using Inactive Relationships in a Measure
- DAX CrossFilter Function
- COALESCE Function to Remove Blanks
- Personalize Visuals
- Gradient Legends
- Endorse a Dataset as Promoted or Certified
- Q&A Synonyms Update
- Import Text Using Examples
- Paginated Report Resources
- Refreshing Datasets Automatically with Power BI Dataflows
- Charticulator
- Dataverse Connector – July 2022 Update
- Dataverse Choice Columns
- Switch Dataverse Tenancy
- Connecting to Google Analytics
- Take Over a Dataset
- Export Data from Power BI Visuals
- Embed a Paginated Report
- Using SQL on Dataverse for Power BI
- Power Platform Solution and Power BI Series
- Creating a Custom Smart Narrative
- Power Automate Button in a Power BI Report
Worth calling out that this approach will translate outputs of you above the built in limits – so it will run successfully but not return all of the rows and/or all the columns specified in the DAX.
One approach to overcome this is to identify which columns you can partition your data on, and then have an outer loop that steps over the unique value combinations of your partition columns and the generates outputs for the partition. It is tedious, but if you’re extracting large volumes of data out of powerbi this is your reality
A really good point. I’ll add it into my post, hopefully though not to many people are extracting large volumes of data using Power Automate, there has to be a better alternative surely.
Hello,
Thank you for providing this information 🙏. I have a few requirements and would like to know if they are possible.
I want to create a schedule for a data flow that runs daily. I have Power BI data and I only need specific columns like name, phone number, and city. However, I want to save/ store this data in JSON format (an array of objects format:-
[{Name:”xyZ”, phone:728789, City:”xyZ”}]) in Azure Blob Storage with the filename in the format dd/mm/yyyy hh:mm (for example, test 26-July-2023 03:50:33).
Could you please guide me on how to achieve this kind of automation? I’m looking forward to your response. Thank you!
Hi
Daily schedule can be done with a scheduled trigger. When you build the table select the right columns before you do the copy query trick.
The next part you need to do is a Parse Json action to make the next steps easy. Then use a Select action if you need to rename the columns. Power Automate keeps arrays in a JSON format so if you use a compose action that will convert it to a string. I’ve not used Azure Blob Services actions so I can’t help you there, but I could create a file in SharePoint or OneDrive using the output of the compose as the file content. Image of my flow is here https://hatfullofdata.blog/wp-content/uploads/2023/08/2023-08-07_21-29-30.jpg
Hi,
Great tutorial. Do you know how RLS can be applied to the email recipients, so each person only sees their own data?
Thanks!
That is something to explore! Work through a list of people and send them emails with rls applied… I think so, will have to play
Where is the tutorial to format the HTML table?