This post is to support a video posted on YouTube regarding creating adaptive cards for Microsoft Teams using Power Automate.

Designing an Adaptive Card
Before you can post an adaptive card to a team you need to design the card. Cards are designed online on an interactive website that will build the JSON definition for you. In this post we will create a very simple card.
::: info Instructions
Click on Designer on the top navigation
Click on New Card
Drag TextBlock elements from the options on the left into the Card. Double click on the text to change the text.
Make changes to the layout and style as required. The JSON defining the card will be updated.
Click Copy card JSON to copy the code to the clipboard.
:::
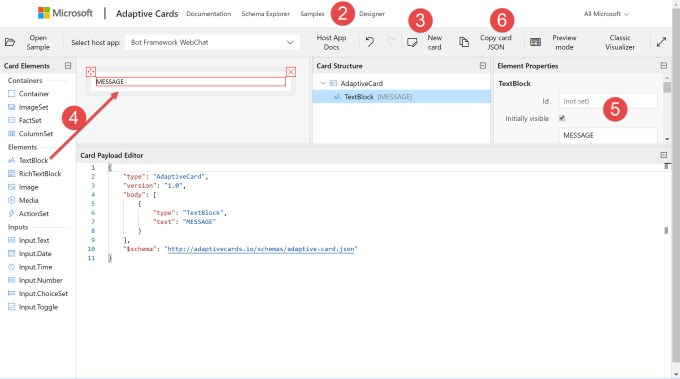
Other elements could be added to the card and formatted as required.
Writing the Flow
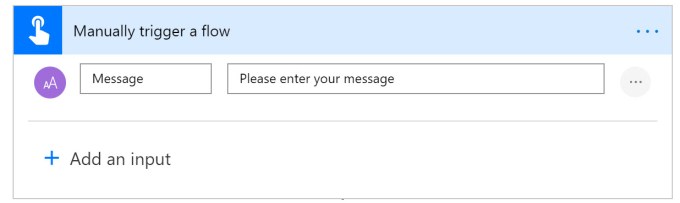
For this post the flow is going to be very simple. I start by adding a button trigger with a single string input called Message.
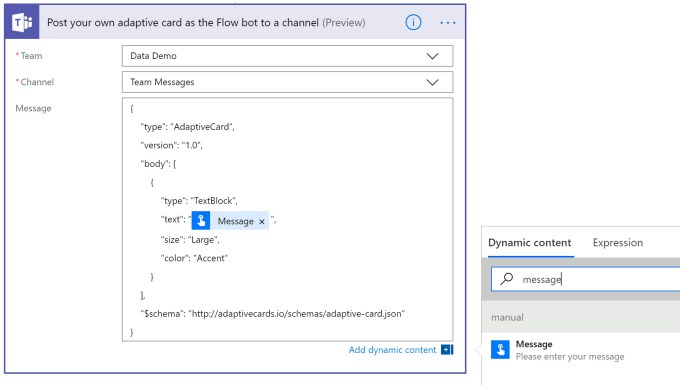
Under the Teams connector, I find the Post your own adaptive card as the Flow bot to a channel. I select the Team and Channel that I want the message to go to.
In the message I paste the Adaptive cards code copied earlier. I double click on the MESSAGE and then click in the Dynamic Content pane on Message to replace the text.
Running the Flow
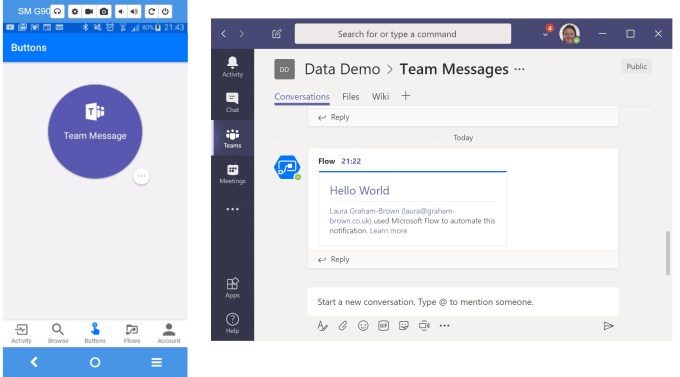
The flow can be run from your phone and the Flow app. Typing in a message will add the card to the channel in Teams.
Conclusion
This is a very simple example of an adaptive card being posted in Teams. The possibilities are endless and are a great next step up from sending email notifications to multiple people.